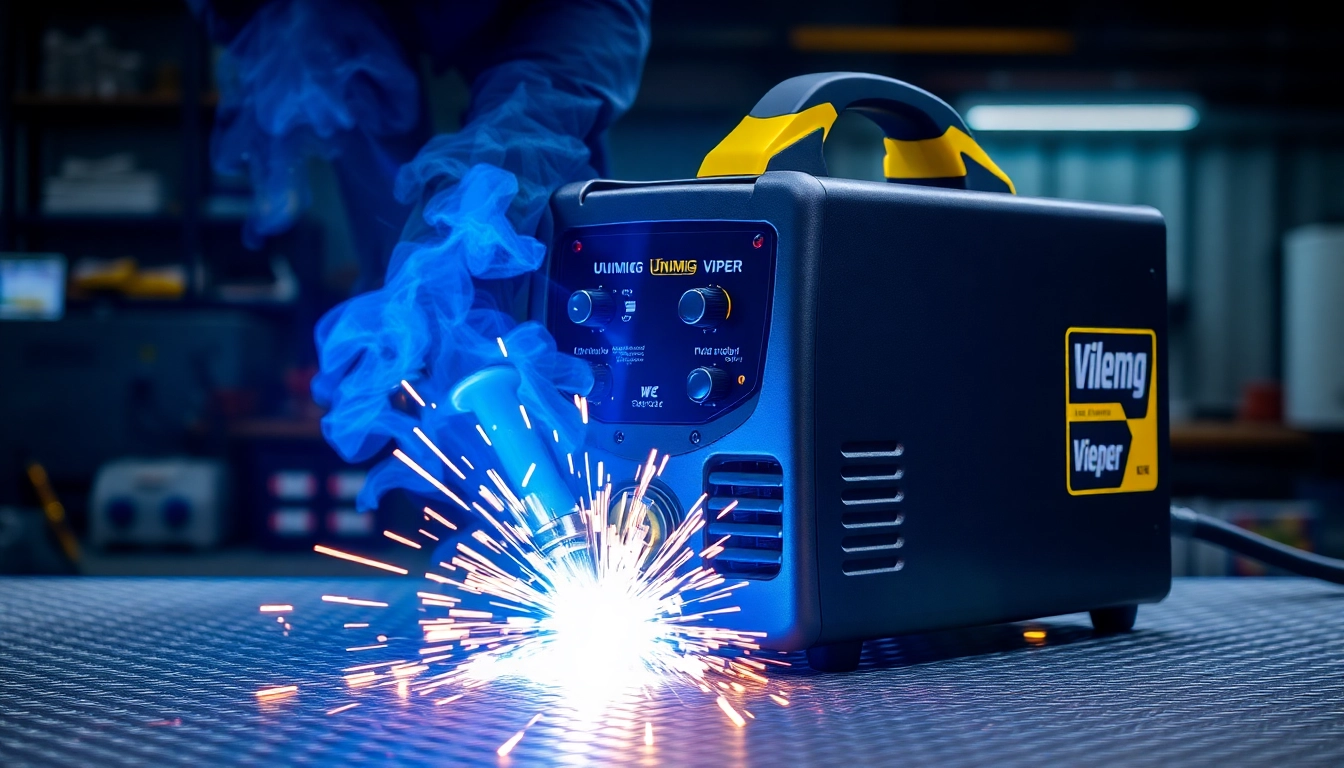
Introduction to Unimig Viper Welding Machines
The Unimig Viper series stands out in the welding equipment market due to its robust design and versatile functionality. These machines are specially engineered to accommodate various welding techniques—including MIG, TIG, and Stick welding—making them suitable for both home enthusiasts and professional craftsmen. As one of Australia’s leading welding brands, Unimig offers superior quality and performance, making the unimig viper an excellent choice for diverse applications.
Overview of the Unimig Viper Series
The Unimig Viper series includes several models tailored to meet the needs of different welders. From the beginner-friendly Viper 120 to the more advanced Viper 195 MAX, each model is designed to provide outstanding power and efficiency. What sets the Viper series apart is its adaptability; these welders excel in various projects, from light home repairs to more demanding industrial tasks. Moreover, the series is celebrated for its reliability—every machine is rigorously tested to ensure it can withstand the rigors of frequent use.
Key Features and Specifications
While the specifications may vary between models, several core features are consistently found across the Unimig Viper series:
- Diverse Welding Processes: Each welder in the Viper series supports MIG, TIG, and Stick welding, offering versatility to handle multiple types of materials.
- Adjustable Parameters: Welders feature adjustable voltage and wire feed speed settings, allowing users to customize their settings based on the thickness and type of material they are welding.
- Portability: Many models are lightweight and designed for easy transport, making them ideal for on-site jobs.
- Safety Features: Built-in protection mechanisms such as thermal overload protection keep both the user and the machine safe during operation.
Ideal Use Cases for Home and Professional Settings
The Unimig Viper series is incredibly versatile, making it suitable for a variety of projects:
- Home Repairs: From repairing wrought iron gates to fixing garden furniture, these welders can handle various materials.
- Automotive Repair: The precise control over the welding process allows automotive technicians to execute intricate repairs with ease.
- Fabrication Work: Ideal for creating custom metal projects, whether for industrial applications or personal artistic endeavors.
Unimig Viper 185: Performance Analysis
Power and Efficiency Ratings
The Viper 185 is often touted as a go-to model due to its impressive power and efficiency ratings. Operating with 185 amps of output, it offers the capability to weld materials up to 6mm thick in a single pass. It features a duty cycle of approximately 60% at maximum output, which is conducive to extended use without overheating. This robust performance ensures minimal downtime, making the Viper 185 a favorite among both DIYers and professionals.
Comparison with Competitor Welders
When compared to competitors, the Unimig Viper 185 holds its own. For instance, welders like the Miller Multimatic 215, while offering similar features, often come with a higher price tag. In terms of versatility, the Viper 185 outshines others in its class due to the combination of MIG, TIG, and Stick welding capabilities, catering to users’ diverse needs without requiring multiple machines for different applications.
User Testimonials and Reviews
Feedback from users often highlights the reliability and performance of the Viper 185. Many experienced welders praise its ease of use, making it a great choice for both novices and seasoned professionals. One user noted, “The Viper 185 is an absolute game-changer for my home projects. It’s powerful enough for thick steel but nuanced enough for lighter tasks.” Such testimonials reflect the strong reputation of the Unimig Viper series in the welding community.
Getting Started with Your Unimig Viper Welder
Essential Setup Instructions
Setting up your Unimig Viper welder is a straightforward process. Begin by ensuring you have a suitable power supply—a standard 10-amp outlet is typically sufficient. Here’s a quick guide to getting started:
- Unbox the welder and ensure all components are present.
- Connect the gas line (if applicable) securely to the gas inlet.
- Attach the ground clamp to the piece you’re planning to weld.
- Plug the welder into the power outlet and turn it on.
- Select the appropriate settings for your material thickness and type.
Recommended Safety Gear and Practices
Safety is paramount when operating any welding equipment. Essential protective gear includes:
- Welding Helmet: A good quality helmet with proper lens shades to protect your eyes from UV rays.
- Protective Clothing: Wear flame-resistant clothes and gloves to protect against burns.
- Respiratory Protection: Depending on materials welded, a respirator may be necessary to avoid inhalation of fumes.
Frequently Asked Questions on Setup
New users often have questions during the setup process. Here’s a look at some common inquiries:
- Can I use the Viper 185 with gasless wire? Yes, it is compatible with both gas-shielded and gasless welding wires.
- What type of power source is required? A standard 10-amp power outlet is adequate for operation.
- Do I need to purchase additional accessories? Depending on your projects, consumables like welding wire and gas may need to be purchased separately.
Advanced Welding Techniques with Unimig Viper
Tips for MIG, TIG, and Stick Welding
Each welding process has its own set of best practices:
MIG Welding:
For MIG welding, maintain a consistent travel speed and keep the nozzle about a quarter-inch from the workpiece to ensure a good arc. Be mindful of the wire feed speed; too fast can lead to messy beads.
TIG Welding:
TIG welding requires a steady hand and precise control over the torch. Use a foot pedal for better control over the current, ensuring a clean and smooth weld.
Stick Welding:
When Stick welding, ensure the electrode is at the correct angle and distance from the material. Practice a whipping motion to maintain an optimal arc length.
Maintenance and Care for Longevity
To ensure the longevity of your Unimig Viper welder, follow these maintenance tips:
- Regularly clean the machine to prevent dust and debris buildup.
- Inspect cables and connections for wear and damage.
- Store the welder in a dry, cool place when it is not in use.
Mastering Aluminum and Stainless Steel Welds
The Unimig Viper series allows for welding of a variety of metals, including aluminum and stainless steel. When welding aluminum, use an argon gas mix and a lower voltage setting to avoid burn-through. For stainless steel, adjust the wire feed speed appropriately and maintain a steady speed to ensure even melting.
Conclusion: Investing in a Unimig Viper Welder
Long-Term Value and Reliability
Investing in a Unimig Viper welder is not just about the initial purchase; it’s about securing a reliable tool that will assist you in various projects for years to come. With a solid build quality and versatile capabilities, the Viper series proves to be a worthwhile investment for DIY enthusiasts and professionals alike.
Where to Purchase and Best Buys
For those interested in purchasing a Unimig Viper welder, consider checking authorized dealers and online platforms. Always look for warranties and after-sales support that can enhance your buying experience and ensure you receive a genuine product.
Final Thoughts on Choosing a Welder
Choosing the right welder is crucial for your welding projects. The Unimig Viper series not only meets diverse welding needs but also offers exceptional reliability and performance. Whether you’re a hobbyist tackling weekend projects or a professional at a job site, you can trust that a Unimig Viper will deliver the quality results you need.